Import Contacts Asynchronously
home
This application uses pre-packaged tools to connect with Salesforce. Based on a simple use case, the application takes a CSV file of contacts and uploads the contact information to an active Salesforce user account. The processing is done asynchronously and is triggered by an HTTP POST request. It uses Anypoint DataWeave to transform data, thereby facilitating quick integration with this Software-as-a-Service (SaaS) provider.
At times, you might find that you need to connect one or more of your organization's on-premises systems with a SaaS such as Salesforce. Ideally, these independent systems would talk to each other and share data to enable automation of end-to-end business processes. Use Mule applications to facilitate communication between your on-prem system(s) and Salesforce. (Though this use case does not extend as far, you can also use Mule to facilitate communication between SaaS providers).
Assumptions
This document assumes that you are familiar with Mule and the Anypoint Studio interface. Further, this example assumes that you have a basic understanding of Mule flows, Mule Global Elements, and Anypoint DataWeave.
This document describes the details of the example within the context of Anypoint Studio, Mule’s graphical user interface, and includes configuration details for XML Editor where relevant.
Example Use Case
Though a simple example, this application nonetheless employs complex functionality to demonstrate a basic use case. The application accepts CSV files that contain contact information – name, phone number, email – and uploads them into a Salesforce account, automatically inserting the correct data into each Salesforce field.
Set Up and Run the Example
Complete the following procedure to create and then run this example in your own instance of Anypoint Studio. Skip ahead to the next section if you prefer to simply examine this example via code snippets.
- Open the Import Contacts Asynchronously project in Anypoint Studio from Anypoint Exchange. Do not run the application.
- Log in to your Salesforce account. From your account menu (your account is labeled with your name), select Setup.
- In the left navigation bar, under the Personal Setup heading, click to expand the My Personal Information folder.
- Click Reset My Security Token. Salesforce resets the token and emails you the new one.
- Access the email that Salesforce sent you and find the security token in it.
- In the Package Explorer click the
src/main/resourcesfolder to expand it and open the filemule-artifact.properties. - Put your Salesforce account-specific values into the properties
sfdc.user,sfdc.password, andsfdc.securityToken. - In the same configuration file, set the HTTP port and API domain information in the properties
http.portandapi.domain. - In your application in Studio, click the Global Elements tab.
- In the Package Explorer, click the
src/main/resourcesfolder to expand it, and then find thecontacts.csvfile inside this folder. - Double-click the File config tab in the Global Elements tab and set the Working Directory field to point to
src/main/resourcesfolder. - In the Package Explorer, right-click the
import-contacts-asynchronouslyproject name, then select Run As > Mule Application. Studio runs the application on the embedded server. - In a REST client (e.g., Postman), trigger the following request:
POST localhost:{http.port}/import/trigger - In the HTTP response, find the Location header. It contains the URL of the
GET /import/statusendpoint. - Send a GET request to the URL that is in the Location header and check the status of the processing. When the status is
IN PROGRESS, the asynchronous processing isn't finished yet and you should try it again later. When the status isCOMPLETED, the asynchronous job is done and the data has been imported into Salesforce. - In your browser, access your Salesforce account, and then navigate to the Contacts tab.
Use the drop-down menu to display All Contacts, and then scan your contacts for two new entries:
- John Doe
- Jane Doe
Stop the Mule application by clicking the red, square terminate button in the Console.
- Delete the three sample contacts from your Salesforce account.
How it Works
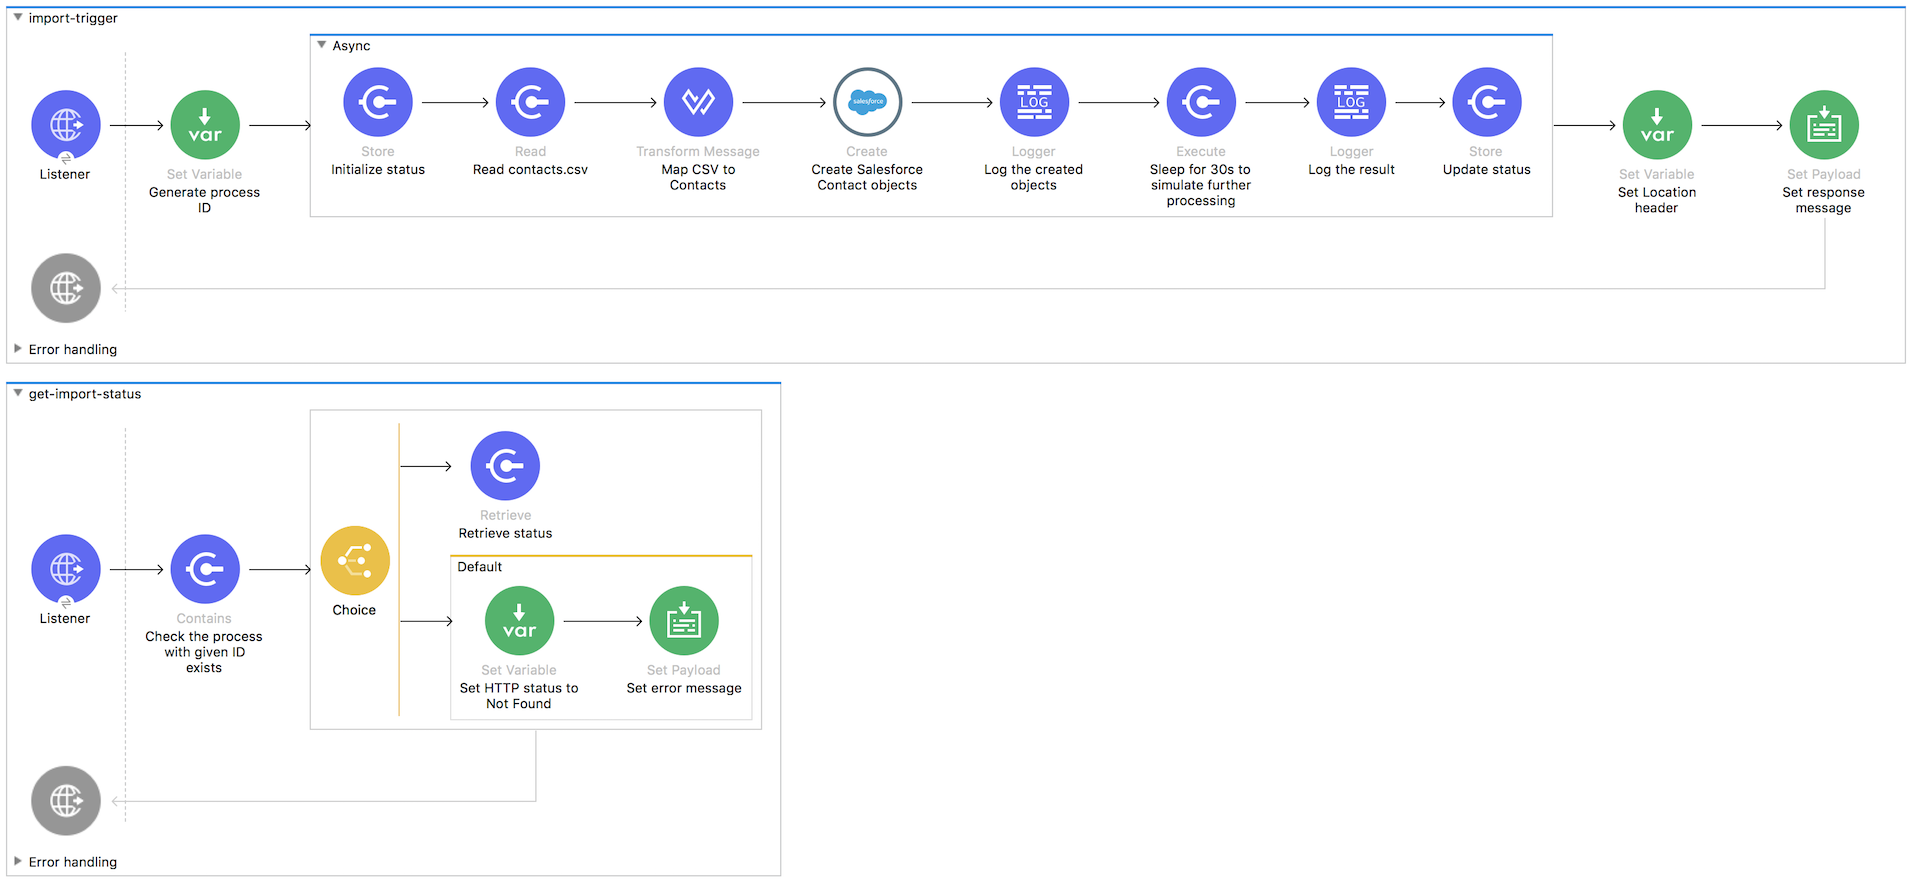
The application consists of two separate flows that are triggered by HTTP POST and GET requests. The first flow starts the asynchronous processing and returns the status to the status endpoint in the Location header. By calling the status endpoint, you can check whether the asynchronous job is done or not.
When the HTTP Listener receives a POST /import/trigger request, it generates the process ID and triggers the import job in the asynchronous scope. Then, it sets the Location header to the status endpoint for this particular process and sends the response back to the user.
The import job first sets the status to IN PROGRESS. Then, it reads the input CSV file and transforms the content to a format accepted by the Salesforce Connector by using the DataWeave transformation language. In the next step, the application uses the Salesforce Connector to push data into your Salesforce account. The connector's configuration specifes the operation – Create – and the sObject type – Contact – which dictate exactly how the data is uploaded to Salesforce to create the new contacts.
To highlight that the processing is done in an asynchronous manner, this project uses a Script Component that calls the Groovy's sleep() command. This command causes the flow to sleep for 30 seconds, so you have a chance to call the GET /import/status endpoint and notice that the processing is in the IN PROGRESS state. In a real world scenario, this component should be omitted. As the last step, the job changes the status to COMPLETED and the processing ends.